
Tissue and Fish Sample Collection Protocols
Below are the recommended protocols for fixing and preserving both tissue samples for DNA studies and specimens for morphological studies.
Here we have instructions for the proper procedures of the following:
Tissue sampling
Fixing whole specimens for DNA
Shipping tissue samples
Fixing specimens after tissue removal
In today’s diverse disciplines of scientific inquiry it is often times necessary to preserve a whole specimen separate from a subsample of tissue where the specimen and its tissue will be used for different types of analyses. This requires different types of fixatives. DNA cannot be obtain from formalin fixed materials. For example, if you want to keep a specimen as a museum voucher you will likely want to preserve it in formalin, but in the 21st century undoubtedly you, or someone you know, will also want to use the same individual(s) in a molecular investigation for phylogenetic relationships, population genetics, or some other genetic study. In these cases differential preservation is required. Below is a method we use for retaining viable tissue(s) to be used in future DNA extractions for molecular investigations and fixing the specimen for diverse types of morphological studies.
A. Tissue Sampling: Please follow these instructions
1. Samples to be used for DNA studies should be taken only from live, frozen live, or anesthetized specimens! DNA cannot be obtained from specimens or tissues that have been exposed to or fixed in formalin.
2. Tissue for DNA studies can come from any part of the organism but are most commonly taken from a piece of excised muscle (muscle plug) or a piece of fin clipped from the specimen.
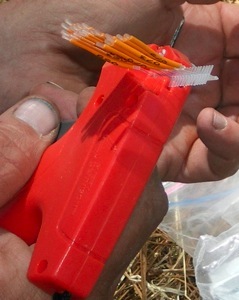
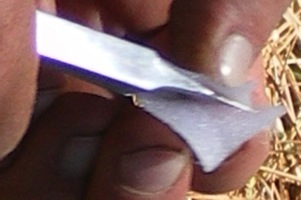
3. DNA cross-contamination is always a potentially serious issue that can compromise results from molecular studies (this is the contamination of one sample of DNA with DNA from another sample). To avoid cross-contaminating DNA specimens you should use a sterile laboratory techniques in the field or in the laboratory. After every tissue plug or fin clip is taken from a specimen the scalpal, knife, razor blade, or scissors and forceps must be cleaned thoroughly of any possible DNA. This is best done by plunging the instruments exposed to the previous sample of DNA (or tissue) into high concentration EtOH (i.e. 70% or greater EtOH) and ignited with a lighter. Caution should be used when igniting the EtOH as it is highly combustible. THIS IS TO BE DONE IN BETWEEN EVERY SINGLE INDIVIDUAL!
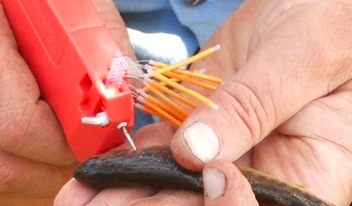
4. If you are sampling specimens in the field, you will need to adopt the sterile laboratory techniques in the field, as well as some other steps. These are outlined below.
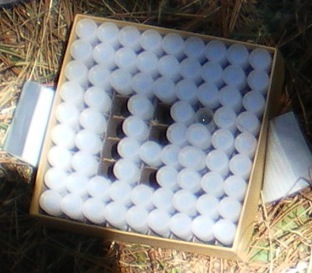
5. Upon completion of collecting individual specimens from a collecting location, you must determine the number of species and individuals that were collected for DNA studies. Prepare the same number of tubes as individuals from which either a fin clip or tissue (muscle) plug will be removed. The tubes can be any size as long as they are sterile and large enough to allow an equal (or greater) volume of EtOH to tissue ratio.
6. Each tube will contain only the tissue of one specimen of a species, not more, as they can be confused. Each tube must have a unique label or number on the outside or inside that corresponds exactly to information in your field notes about the species and individual in the tube, location where the specimen is from, including latitude and longitude, date of collection, collectors, and any additional information that you wish to provide. As the tubes can be small, usually a number or some alphanumeric code is used to identify the label and this is also identified in your field notes.
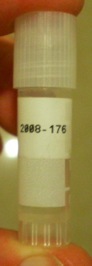
7. It is always a good idea to include a small label inside a tube in case the label on the outside of the tube is rubbed off or lot in some way. Prepare labels for each tube that include collection and individual ID #, e.g. RLM 08-100-1 (for Richard L. Mayden’s 2008 collections at site number 100 and individual specimen #1), the date the collection occurred on and an individual identifier to distinguish between fin clips (if for example more than one species of Catostomus is collected then 2 tubes with a fin clip in each will be worthless). The label may include more information, but must minimally include this information so as to be useful when referencing completed field notes. Make sure the label is legibly written on card stock and with ink that will not dissolve in EtOH.
8. Fill tubes with 100% EtOH (if they have not already been filled) and add the individual label from step 3 to each tube.
9. Close each tube, or at least remove the tubes from the immediate work area, so as not to add the tissue sample to the wrong tube.
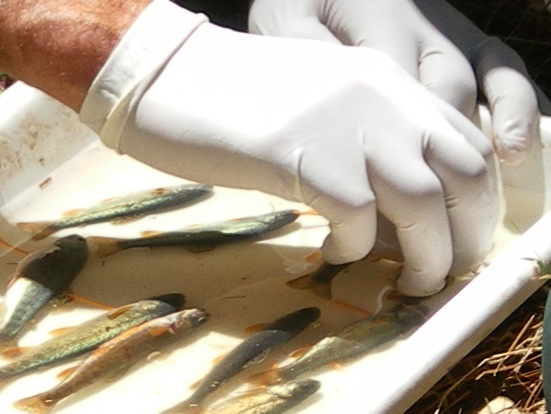
10. Anesthetize each fish in a solution of MS-222.
11. Once fish are “unconscious” place it with its right side up and facing you. Tissue and fin clips should be removed from only the right side of the fish. Do not damage the left side of the fish as this is the side used for morphological studies.
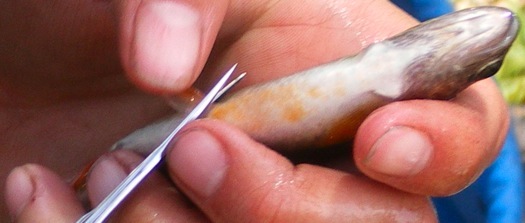
12. With sharp (sterile) scissors clip the right pectoral or pelvic (or both) fin(s) near the base of the fin. Once the fin is successfully removed place it into the properly labeled tube with EtOH. The same procedure can be used for removing a tissue (muscle) plug, though instead of scissors a sharp (sterile) scalpel or knife should be used to remove muscle and skin from the epaxial muscles lateral to the dorsal fin (right dorso-lateral musculature).
13. The specimen should be tagged with some identification method that identifies it with the same number corresponding to the number used for the tissue.
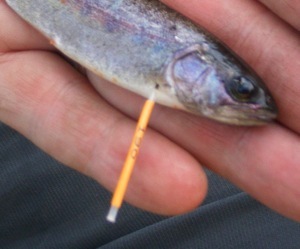
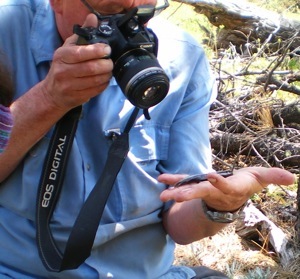
14. Photograph the specimen so that you have a voucher photograph of a live specimen to accompany the tissue sample and specimen.
The specimen can now be fixed in the 10% formalin fixative (or the preferred fixative) at this point. Go to D (below) for tips on fixing specimens.
15. Sterilize the forceps, scissors, scalpel or knife and move on to the next fish specimen. Again, sterilize by plunging the instruments exposed to the previous sample of DNA (or tissue) into high concentration EtOH (i.e. 70% or greater EtOH) and ignited with a lighter. Caution should be used when igniting the EtOH as it is highly combustible. THIS IS TO BE DONE IN BETWEEN EVERY SINGLE INDIVIDUAL!
16. After 1-2 hours change the EtOH in all of the tubes and replace with fresh 95-100% EtOH. A final change should be done after another 6-8 hours.
17. Keep the samples as cool as possible in storge in the field or laboratory. You may even place them in the freezer when not being used. Maintaining samples at a cooler temperature prolongs the life of the usable DNA.
B. Fixing Whole Specimens for DNA Studies?
It is possible to fix a whole specimen in 95-100% EtOH for DNA studies but only if the specimen is small and if the amount of EtOH is much greater than the specimen AND if you change the EtOH 3-4 times over the next six hours. This method is only to be used in instances where the specimens are too small to remove tissue or fins without damaging the specimen or if you do not have the proper utensils to remove tissue. It is critical that you have much greater amount of EtOH than the specimen and that you change the EtOH frequently so that the specimen is quickly dried by the EtOH to preserve the DNA. One thing that will assist with this is to open the abdomen of the specimen to allow the EtOH to penetrate and fix rapidly.
C. Shipping Tissue Samples
EtOH is a flammable liquid and sample should not be shipped in EtOH. Prior to shipping you should decant the EtOH off of the tissues, fin clips or specimens, leaving them only moist. The samples should be shipped in the tubes that they were fixed in with EtOH with all labels with the sample. Materials should be mailed by a reliable mail system (FEDEX, DHL, UPS). If these companies will not ship your samples then you will have to use regular postal systems but you can request that they are sent by the best possible.
Ship samples to:
Dr. Richard L. Mayden
Department of Biology
3507 Laclede Ave
Saint Louis University
St. Louis, Missouri 63103-2010 USA
You do not have to label the package as containing fish or fish tissues. You can label the package as containing either:
water samples
educational materials
research materials
D. Fixing Specimens in Formalin
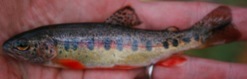
After tissue samples are taken from the specimen it is important to maintain a voucher specimen that can be used for either later verification of identification (voucher) or for morphological studies. Here are recommendations on fixing the specimen for either of these instances.
The specimen should have a tag with the identification number or alphanumeric code used for the tissues. This tag can be written on a piece of high-quality card stock paper with insoluable ink or pencil, rolled and inserted into the mouth of the specimen or under the operculum where it cannot be lost. Other tag methods include tying a tag through a fin with string and high-quality card stock paper or around the caudal peduncle. If the latter, do not tie it too tight to distort the shape of the caudal peduncle.

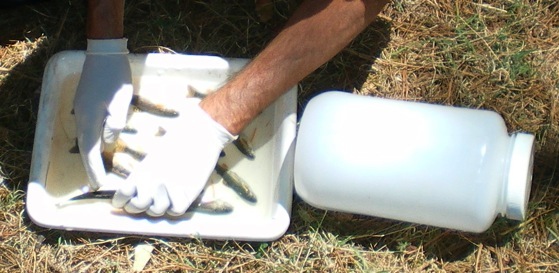
Fixing specimens can be done by placing specimens in a jar of 10% solution of formalin or fixing anesthetized specimens in a tray to ensure perfect fixation of fins and body.
Fixing specimens in a jar. If you place the specimens in a jar of 10% solution of formalin you must make sure that the jar is both large enough for all the specimens that you wish to fix AND that there will be adequate solution for the specimens to move around in during the fixation. If you put too many specimens in a jar they will not fix properly and will be contorted and poorly fixed. Do not overcrowd the jar. After the specimens are in the jar, you may wish to lay the jar on its side to give the specimens more room to move around during fixation.
The final step after placing specimens in a jar of 10% formalin is to make a small incision in the abdomen of larger specimens (> 100 mm) to allow for formalin to penetrate the abdomen and fix internal organs and body cavity. This is critical or the specimens will bloat and be deformed due to decay. The incision need only be about 30-50% the length of the distance between the anal fin origin and the base of the pelvic fins (in most fishes). This can be done after all the specimen have been fixed.
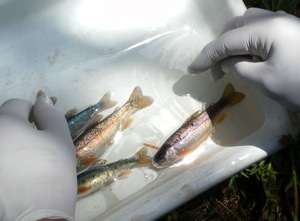
Fixing specimens in a tray (BEST). Should you prefer to fix the specimens more properly, especially larger specimens (> 100 mm), place the anesthetized specimen in a tray of concentrated (20-30% formalin) and begin to straighten fins and body. It is critical that the specimen is fully anesthetized so that the formalin is not splashed on users. You should use gloves to protect your hands during this process and work in an area that is well ventilated or where a respirator that is effective for formalin.
The final step before placing the specimens in a jar of 10% formalin (as described above) is to make a small incision in the abdomen to allow for formalin to penetrate the abdomen and fix internal organs and body cavity. This is only necessary for specimens larger than about 100 mm. This is critical or the specimens will bloat and be deformed due to decay. The incision need only be about 30-50% the length of the distance between the anal fin origin and the base of the pelvic fins (in most fishes).
After the specimens have been in formalin for a period of 5-8 days they should be rinsed with freshwater and the formalin should be disposed of properly. The specimens should be rinsed regularly over a period of 1-2 days with water being changed regularly to remove as much formalin as possible. When decanting the water or filling the jar with fresh water you should be very careful that nothing important is lost with water overflowing (small specimens, other organisms fixed from the location, eggs, larvae, etc.).
After the specimens have been rinsed they can be sorted to species, placed in separate museum-quality jars with proper labels made of high-quality card stock and permanent ink, and filled with 70% EtOH.
Richard Mayden and Casey Dillman
updated 10/7/2008
Please install Flash® and turn on Javascript.
If you encounter any security errors loading Monoslideshow, please update your security settings by adding the Monoslideshow folder to the trusted locations.